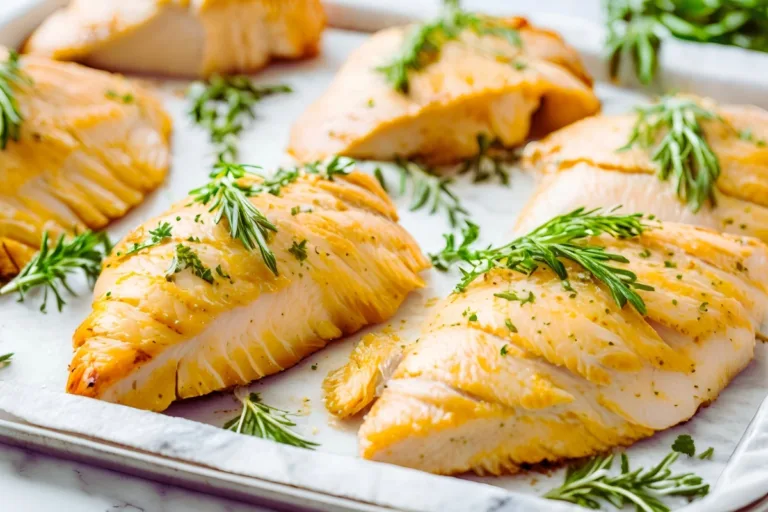
Why Baking Temperature Matters for Chicken Breasts
Cooking chicken breasts can be tricky, especially when trying to balance flavor, juiciness, and safety. Many people wonder exactly how long to bake chicken breasts at 400°F to achieve tender and juicy results. Baking at this temperature is a reliable method to cook chicken quickly while retaining its natural moisture, but understanding timing and preparation is key to success.
Knowing how long to bake chicken breasts at 400°F ensures you achieve the perfect balance of tenderness and flavor every time.
At 400°F, you’re working with a sweet spot that cooks the chicken evenly and helps lock in moisture. Lower temperatures, such as 350°F, often require longer baking times, which can lead to overcooked edges. Higher temperatures, like 425°F, can rush the process, sometimes leaving the center undercooked while drying out the surface. Baking at 400°F offers a balance, making it one of the most recommended methods by professional chefs.
Additionally, baking at the correct temperature influences the chicken’s texture. Proper heat management helps avoid the rubbery or tough consistency many people struggle with. For example, baking at 400°F allows you to achieve the perfect combination of a moist interior and a slightly golden crust.
Overview of Cooking Chicken Breast at 400°F
Baking chicken breasts at 400°F has become a go-to method for home cooks looking to combine efficiency and great taste. This approach works well for both simple recipes and more complex dishes that involve marinades or breading. For more details on baking chicken breasts at this temperature, including recipe ideas and preparation tips, visit this detailed resource.
When deciding how long to bake chicken breasts at 400°F, it’s important to consider the thickness of the meat and whether it’s boneless or bone-in.
Using a reliable meat thermometer can eliminate guesswork and help determine how long to bake chicken breasts at 400°F safely.
Typical Cooking Times for Chicken Breasts at 400°F
While the exact time depends on the size and preparation of the chicken, general guidelines provide a helpful starting point:
- Boneless, skinless chicken breasts: These typically take 20 to 25 minutes to bake at 400°F.
- Bone-in chicken breasts: With the bone acting as an insulator, these cuts need more time, generally 35 to 40 minutes.
Regardless of the cut, it’s essential to rely on a meat thermometer to ensure the chicken is cooked to an internal temperature of 165°F, the USDA’s recommended safe temperature for poultry.
Factors That Influence Baking Time
Several factors can affect how long it takes to bake chicken breasts at 400°F, and understanding these can help you plan your cooking more effectively:
- Thickness of the chicken breast:
Thicker cuts take longer to cook, as the heat needs more time to penetrate the center. If you’re dealing with uneven pieces, consider pounding the chicken to a uniform thickness to promote even cooking. - Use of a marinade or coating:
Chicken that’s marinated or coated in a thick sauce may take a few minutes longer to bake. The added layer can insulate the meat slightly, slowing down the cooking process. - Oven performance:
Every oven is different, and slight variations in actual temperature can impact cooking times. Using an oven thermometer can help you ensure accuracy. - Cooking equipment:
The type of pan you use matters too. A heavy-duty baking sheet or a glass dish may retain heat differently, which can influence how the chicken cooks. Additionally, baking on a rack allows heat to circulate evenly, often resulting in shorter cooking times.
Common Misconceptions About Baking Chicken
Many people mistakenly believe that baking chicken breasts at lower temperatures guarantees juiciness. While it’s true that low-and-slow cooking can work for some cuts, it’s not always ideal for lean chicken breasts. Prolonged exposure to heat, even at lower temperatures, increases the risk of dryness, particularly around the edges.
Another myth is that you need to flip chicken breasts halfway through baking. In reality, this step is unnecessary when baking at 400°F. The consistent heat ensures even cooking, provided the chicken is arranged properly in the pan.
Some also think that covering the chicken with foil is a must to retain moisture. While foil can help in specific recipes, it’s not essential at 400°F. Leaving the chicken uncovered allows it to develop a slightly crisp exterior while still staying juicy inside.
With these basics in mind, you’re well on your way to mastering the art of baking chicken breasts at 400°F. Whether you’re a beginner in the kitchen or a seasoned cook, understanding the factors that influence baking times and methods will help you consistently achieve perfect results.
Part 1 is now complete. Would you like me to proceed to Part 2?
Why Baking Temperature Matters for Chicken Breasts
Cooking chicken breasts to perfection depends heavily on temperature. The right temperature not only ensures thorough cooking but also enhances texture and flavor. If the temperature is too low, the chicken may remain undercooked in the center. On the other hand, overly high heat can lead to dryness and a rubbery texture.
Chicken breasts are lean, meaning they have little fat to retain moisture during the cooking process. A steady, controlled temperature like 400°F strikes the perfect balance, delivering juicy, flavorful results without overcooking.
Overview of Cooking Chicken Breast at 400°F
Baking chicken breasts at 400°F is a popular method among home cooks and chefs alike. This temperature provides a nice balance of heat that cooks the meat quickly while retaining its natural juices. It’s also versatile, working well for different preparations such as marinated, seasoned, or breaded chicken.
Typical Cooking Times for Chicken Breasts at 400°F
The cooking time for chicken breasts at 400°F can vary depending on several factors. On average:
- Boneless, skinless chicken breasts: 20–25 minutes.
- Bone-in chicken breasts: 35–40 minutes.
It’s always recommended to check the internal temperature to ensure safety and doneness. A meat thermometer reading of 165°F in the thickest part signals that the chicken is cooked through.
Factors That Influence Baking Time
Several factors can affect how long it takes to bake chicken breasts at 400°F:
- Thickness of the chicken breast: Thicker pieces require more time to cook compared to thinner cuts. For even cooking, try to pound the chicken to a uniform thickness before baking.
- Use of a marinade or coating: A thick marinade or breading can extend cooking times, as the outer layer acts as a barrier to heat penetration.
Common Misconceptions About Baking Chicken
Many myths surround the process of baking chicken breasts. One common belief is that cooking at a lower temperature, like 350°F, always prevents dryness. While this may work in some cases, it can also lead to prolonged cooking times, which increases the risk of drying out the meat.
Another misconception is that you must flip the chicken midway through baking. In reality, baking chicken breasts at 400°F allows even heat distribution, eliminating the need to flip if you use proper preparation techniques, like arranging them on a baking rack or tray.
Understanding the Right Baking Temperatures for Chicken
Cooking chicken breasts to perfection involves more than just following a recipe—it’s about understanding how temperature affects the outcome. When deciding whether to bake chicken at 350°F or 400°F, it helps to compare these options to choose the one that aligns with your goals.
Comparing 350°F vs. 400°F for Baking Chicken Breasts
Benefits of Baking at 350°F
Baking chicken breasts at 350°F is often seen as the safer option for beginners. The lower temperature reduces the risk of overcooking the chicken, giving you a bit more room for error. This method is particularly useful if you’re preparing thicker cuts or using bone-in chicken.
Additionally, the slower cooking process can help certain recipes develop more flavor, especially if you’re incorporating marinades or herbs. For example, a rosemary and garlic marinade may infuse the meat more thoroughly when baked at a gentler heat. However, the trade-off is that the cooking time is noticeably longer, often exceeding 30 minutes for boneless pieces.
Benefits of Baking at 400°F
When time is of the essence, baking at 400°F is the way to go. The higher temperature speeds up the cooking process, making it ideal for busy weeknights. This method also delivers a more defined crust on the chicken, especially when seasoned with spices or coated in breadcrumbs.
Furthermore, baking at 400°F helps retain moisture when done correctly. The shorter cooking time minimizes the chance of the chicken drying out, provided it’s removed from the oven as soon as it reaches 165°F internally. If you’re aiming for golden, flavorful results in a shorter period, 400°F is the clear winner.
The Science Behind Cooking Chicken Breast Without Drying It Out
Chicken breasts are notoriously tricky to cook because they lack the fat content that keeps other cuts, like thighs, naturally moist. However, understanding the science of internal temperature can help you avoid common pitfalls.
Role of Internal Temperature in Perfectly Baked Chicken
The internal temperature of chicken is the most important factor in determining doneness. According to USDA guidelines, chicken is safe to eat when it reaches an internal temperature of 165°F. However, hitting this mark too early can lead to dryness, as residual heat continues to cook the chicken after it’s removed from the oven.
A common technique to avoid overcooking is to take the chicken out when it’s around 160°F, then let it rest. During this resting period, the temperature rises slightly, allowing the chicken to reach the ideal 165°F without becoming dry.
Why Overcooking Leads to Dryness
Overcooking chicken breasts is one of the main reasons they turn out dry and rubbery. Once the internal temperature climbs above 165°F, the proteins in the chicken begin to contract, squeezing out moisture. This is why it’s crucial to monitor the cooking process carefully, especially when baking at higher temperatures like 400°F.
Importance of Preheating Your Oven
Many home cooks underestimate the importance of preheating the oven, but this step is crucial for achieving consistent results. Starting with a properly heated oven ensures that the chicken begins cooking immediately, which helps lock in juices and prevents uneven cooking.
Preheating also stabilizes the baking environment, so the chicken isn’t exposed to fluctuating temperatures that can impact texture and taste. For best results, always allow your oven to reach 400°F before placing the chicken inside. Using an oven thermometer can help verify that your appliance is maintaining an accurate temperature.
Ideal Temperature and Timing for Baking Chicken Breast
Even though 400°F is a versatile temperature for baking chicken, fine-tuning the timing and techniques can elevate your results. By following specific practices, you can ensure that your chicken breasts turn out juicy, tender, and full of flavor.
Best Practices for Achieving Juicy Chicken Breasts
When baking chicken breasts, preparation is key. Start by patting the chicken dry with paper towels, which helps the seasoning adhere better. Brining is another effective method to enhance juiciness, especially for boneless cuts. A simple brine of salt and water can make a noticeable difference in flavor and moisture retention.
Additionally, placing the chicken on a wire rack over a baking sheet allows air to circulate, promoting even cooking. This setup helps prevent the dreaded soggy bottom that can occur when chicken is baked directly on a pan.
Recommended Internal Temperature for Chicken Safety
For additional tips on selecting the right baking temperatures and achieving the best flavor while ensuring food safety, check out this guide on baking chicken temperatures.
USDA Guidelines for Safe Cooking
The USDA advises that all poultry, including chicken breasts, should be cooked to an internal temperature of 165°F to eliminate harmful bacteria. This guideline is non-negotiable for food safety, but it doesn’t mean you have to sacrifice moisture.
By using a meat thermometer, you can ensure the chicken reaches the safe temperature without overcooking. Digital thermometers are particularly useful for providing quick and accurate readings.
Adjusting Cooking Times for Bone-In vs. Boneless Chicken
Thickness and Cut Considerations
The thickness and type of chicken breast significantly impact cooking times. Bone-in chicken breasts, for instance, take longer to bake due to the insulating effect of the bone. When baking at 400°F:
- Boneless chicken breasts: 20–25 minutes
- Bone-in chicken breasts: 35–40 minutes
Thicker cuts should always be checked with a thermometer, as visual cues like color can be misleading. For example, the outside may appear golden and fully cooked while the interior remains undercooked.
By mastering these concepts, you’ll not only ensure that your chicken breasts are safe to eat but also guarantee they’re as tender and flavorful as possible. From understanding temperature differences to following best practices for preparation, every step contributes to a perfect result.
Tips and Techniques for Perfectly Baked Chicken Breasts
Baking chicken breasts at 400°F is straightforward, but a few key techniques can make all the difference between ordinary and exceptional results. Whether you’re preparing a simple weeknight meal or a centerpiece dish for guests, these methods ensure your chicken turns out perfectly every time.
Step-by-Step Guide to Baking Chicken at 400°F
Preparing the Chicken: Marinades, Seasonings, and Brines
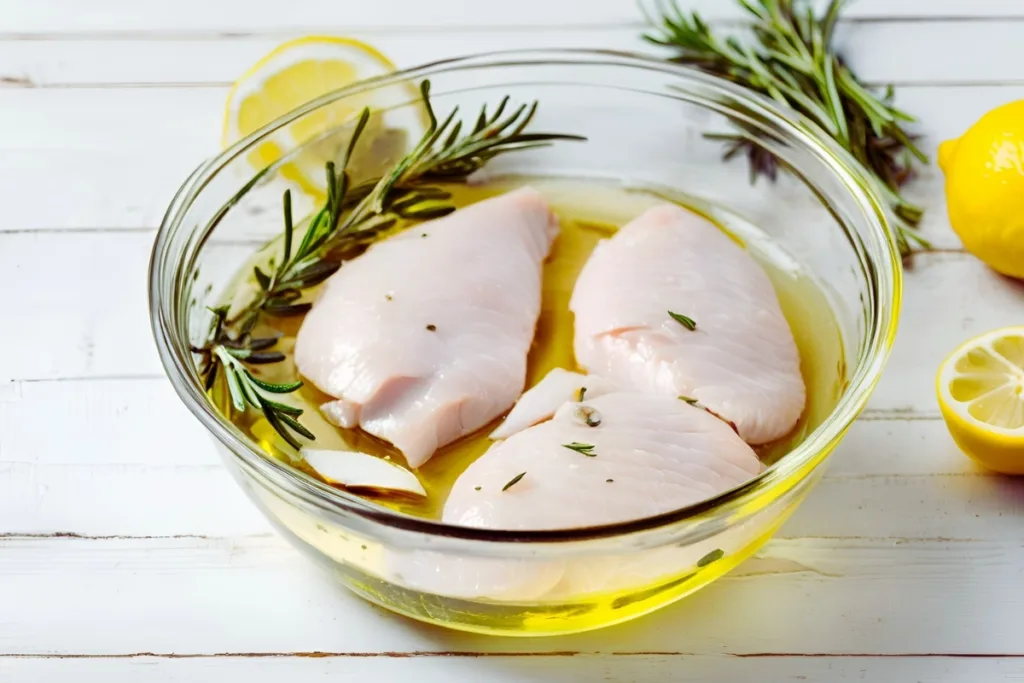
Preparation starts with choosing the right approach for flavor and moisture. Marinades, seasonings, and brines are excellent options to enhance the chicken:
- Marinades: Combining ingredients like olive oil, lemon juice, garlic, and herbs can infuse the chicken with deep, vibrant flavors. Marinate for at least 30 minutes or up to 8 hours for optimal results.
- Seasonings: A simple mix of salt, pepper, paprika, and garlic powder works wonders for those seeking quick and effective preparation.
- Brines: Soaking chicken in a saltwater solution for 1–2 hours before baking can significantly boost juiciness, especially for lean cuts like boneless chicken breasts.
Proper Use of Baking Trays and Foil
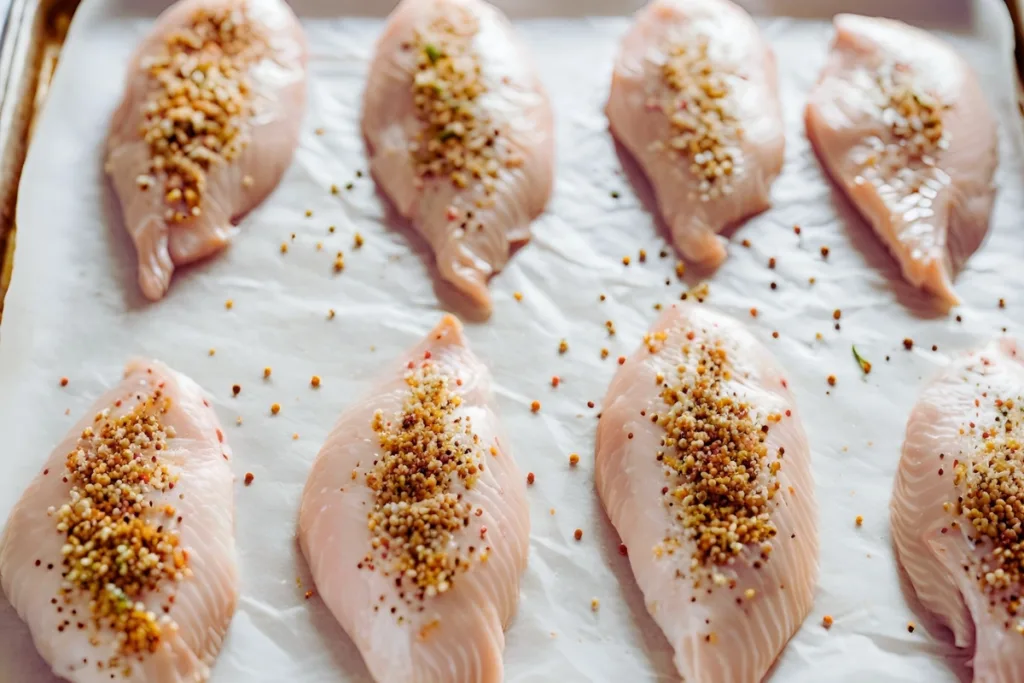
Using the right tools is just as important as the chicken itself. Arrange the chicken on a baking tray lined with parchment paper for easy cleanup and even cooking. For added moisture, cover the chicken loosely with foil for the first half of the baking time. This traps steam, preventing the chicken from drying out.
Alternatively, bake the chicken on a wire rack placed over a tray. This allows air to circulate, ensuring even cooking and a crisp exterior.
Monitoring Cooking Progress with a Meat Thermometer
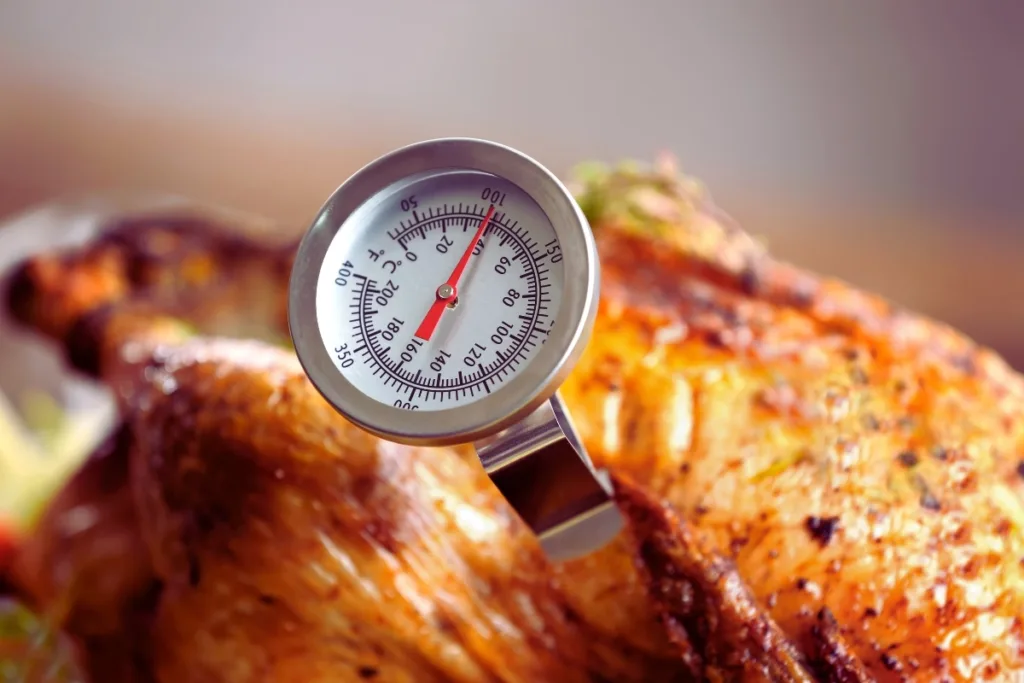
A meat thermometer is indispensable when baking chicken. Insert the thermometer into the thickest part of the breast to check the internal temperature. At 400°F, start checking around the 18-minute mark for boneless chicken and the 30-minute mark for bone-in cuts.
Remove the chicken from the oven when it reaches 160°F, then let it rest for 5–10 minutes. The internal temperature will continue to rise to the USDA-recommended 165°F during this resting period.
Alternative Cooking Methods for Moist Chicken Breasts
If you’re looking for variations like thinner cuts, try this easy recipe for baked chicken cutlets that pairs perfectly with side dishes.
Pan-Searing and Baking Combination
This method involves searing the chicken breasts in a hot skillet before transferring them to the oven. The high heat of the skillet creates a flavorful crust, while baking at 400°F ensures the interior cooks evenly. This approach is especially effective for recipes involving sauces or pan drippings.
Sous Vide for Guaranteed Moisture
Sous vide cooking allows you to cook chicken breasts to the exact temperature without overcooking. After sous vide, briefly bake the chicken at 400°F to achieve a golden, caramelized exterior. This method guarantees consistent results and unparalleled moisture.
Preventing Common Mistakes When Baking Chicken
Avoiding Overcrowding the Pan
Overcrowding the pan is a common mistake that can lead to uneven cooking. When chicken breasts are too close together, they release steam, which prevents proper browning and can leave the meat soggy. Always leave space between pieces to allow heat to circulate freely.
Allowing Chicken to Rest After Baking
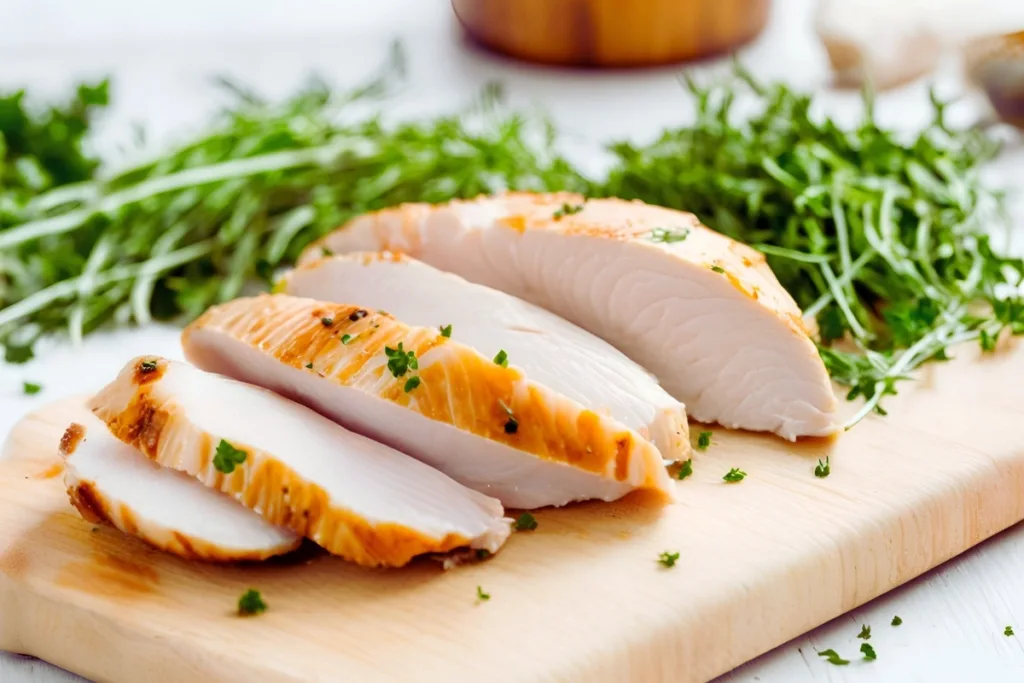
Resting chicken after baking is a crucial step that many overlook. Letting the meat sit for 5–10 minutes before slicing allows the juices to redistribute, resulting in a more tender and flavorful dish. Skipping this step often leads to dry, less appetizing chicken.
Summary of Best Practices for Baking Chicken at 400°F
Recap of Temperature, Time, and Preparation
To bake the perfect chicken breast at 400°F:
- Preheat the oven for consistent results.
- Prepare the chicken with marinades, seasonings, or brines.
- Bake boneless chicken for 20–25 minutes and bone-in chicken for 35–40 minutes.
- Use a meat thermometer to check for an internal temperature of 165°F.
- Allow the chicken to rest before serving to lock in juices.
These simple yet effective practices ensure your chicken breasts turn out moist, flavorful, and cooked to perfection every time.
FAQs
How Long to Bake Chicken Breasts at 400°F?
The answer to how long to bake chicken breasts at 400°F depends on whether they are boneless or bone-in. Boneless breasts take 20–25 minutes, while bone-in needs 35–40 minutes.
How Long Does It Take to Bake Chicken Breast at 400°F With Foil?
Baking chicken with foil at 400°F typically takes 25–30 minutes for boneless breasts and 40–45 minutes for bone-in cuts. The foil traps steam, which keeps the chicken moist but may extend the cooking time slightly. Be sure to uncover the chicken in the last few minutes for a golden finish.
Is It Better to Bake Chicken at 350°F or 400°F?
Both temperatures have their benefits, but baking at 400°F cooks the chicken faster and helps retain more moisture. On the other hand, 350°F offers more forgiveness for beginners who might overcook the chicken. Whichever you choose, monitoring the internal temperature ensures optimal results.
Which Temperature Retains Moisture Best?
A higher temperature like 400°F retains moisture better because it shortens the overall cooking time. However, it’s important to remove the chicken promptly once it reaches 165°F to avoid overcooking, which causes dryness regardless of the temperature used.
What Is the Best Temperature for Baking Boneless Chicken Breasts?
The best temperature is 400°F, as it allows for a quicker cook time while preserving the chicken’s juices. Lower temperatures can work but often lead to uneven cooking or dryness if the chicken remains in the oven too long. Using a meat thermometer is key to consistency.
Do Bone-In Chicken Breasts Require Higher Heat?
Bone-in chicken doesn’t require a higher temperature but does need longer cooking times. The bone acts as insulation, which slows the cooking process. Baking at 400°F is still effective, but expect an extra 10–15 minutes compared to boneless breasts.
What Is the Best Way to Cook Chicken Breast Without Drying It Out?
The best way is to bake at 400°F, as this temperature cooks the chicken quickly without sapping moisture. Additionally, brining, marinating, or covering the chicken during part of the bake helps lock in juices. Letting the chicken rest afterward is also critical for retaining moisture.
Does Adding Liquid Help Keep Chicken Juicy?
Yes, adding a small amount of liquid, such as broth or a marinade, can create steam during baking, which keeps the chicken moist. However, it’s not always necessary if you use a marinade or bake at the right temperature for the correct amount of time.
Can Low and Slow Cooking Be Better for Tenderness?
Low and slow cooking is better suited for cuts with more connective tissue, like thighs or drumsticks. For lean chicken breasts, the quick cooking at 400°F prevents overcooking and maintains tenderness without sacrificing moisture.
Should You Use a Meat Thermometer to Check Chicken Breasts?
Absolutely! A meat thermometer ensures the chicken is cooked to a safe 165°F while preventing overcooking. Insert it into the thickest part of the breast for the most accurate reading. This step eliminates guesswork and ensures perfect results every time.
What Are Some Popular Seasonings for Chicken Breasts?
Popular seasonings include a mix of garlic powder, paprika, salt, and pepper for a classic taste. For more adventurous flavors, try Italian herbs, Cajun spice blends, or a honey-soy glaze. These combinations enhance the chicken’s natural flavor and pair well with a variety of sides.

